

With that in mind, here are some tips for shooting in those specific conditions:
Indoors in low light

When you find yourself in dimly lit interiors, don’t assume you need flash. As a rule, if you can see it you can photograph it. By using a tripod or other camera support you’ll be able to shoot in low-light situations with your preferred sensor setting. Alternatively, increase the sensitivity of your camera’s sensor to hand-hold the camera but be aware at what setting noise will become a problem with your particular sensor.
Yes, you can use flash, which is certainly a convenient light source that will let you take a photo even in the darkest places without having to change sensor setting or use a tripod, as long as the subject is within the power range of your unit. However, pictures taken with flash from built-in or hot-shoe mounted units are usually unexceptional. The direct, frontal light is harsh and rarely flattering. It creates hard shadows on surfaces behind the subject and backgrounds are often too dark. Much more visually appealing and creative images can be taken using incandescent, or artificial, light sources such as electric light bulbs, floodlights or candles.
There are good reasons for being prepared to work with the available light. Most importantly, you’ll be able to take pictures in many places where the use of flash is impractical (floodlit buildings, displays behind glass); prohibited (churches, museums, concerts); intrusive (religious ceremonies); or would simply draw unwanted attention to your presence (covered markets, shops and shopping centres).
If your camera’s White Balance control is on automatic, check that you’re happy with the way it’s recording the colours in the scene. Remember that the white-balance function adjusts the colours to ensure that white is recorded as white under all lighting conditions. For more accuracy select one of the presets that typically include tungsten and fluorescent-lighting settings. If you’re shooting raw files, you can also fine-tune the white balance in your image-conversion software before processing.
You’ll probably find yourself alternating between low light situations and daylight (think gallery hopping) so get into the habit of resetting the ISO to the lowest setting, known as the native setting, immediately after you’ve finished shooting at a higher sensitivity, as this is where the sensor will perform at its optimum potential. It’s easy to be shooting interiors at 800ISO and forget to put it back only to find later that you spent the rest of the day shooting at 800ISO outdoors in bright sunlight.
Rainforests and jungles

Rainforests and jungles are two of the most difficult landscapes to photograph well. Often the light is too low to hand-hold the camera and causes automatic flashes to fire. If the sun is shining strongly enough to break through the canopy, the trees become speckled with uneven light and pictures will look colourless and messy.
The best time to take pictures in these environments is after it has rained, or in light drizzle. The cloudy skies guarantee an even light and the water on the leaves adds life and emphasises the colour. A polarising filter is very useful as it will cut down the reflections off the wet leaves, increasing the intensity of the colours. However, with lower ISO sensor settings, a polarising filter and low light, shutter speeds will be too slow to hand-hold. A tripod is essential and you’ll be able to precisely control depth of field. Without a tripod, look for brighter areas where hand-held photography may be possible. You’ll find these around the edges of the treed areas and in clearings near streams, rivers and waterfalls.
Snow, ice and glaciers

Be careful using polariser filters for scenes featuring snow and ice. Often blue skies are already very dark and can go almost black. When shooting landscapes in snow be aware of where you’re walking – you could leave your own footprints in an area you want to photograph.
When it’s actually snowing or sleeting a slow shutter speed will allow you to show just how bad the weather was by capturing the falling snow and rain as streaks of colour.
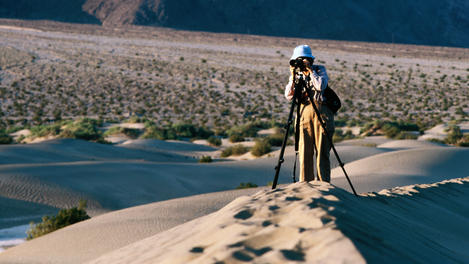
Deserts

Remember to watch where your own shadow is falling and not to leave footprints in areas you want to portray as pristine. Look for a vantage point to survey the area and walk around the edges of potential picture subjects. Climb dunes on the shadow side, as you’re less likely to make it a feature of the landscape.
Extra attention must be paid to camera care when taking pictures in sandy environments, especially when it’s windy. Only expose you’re camera to the elements when you’re ready to shoot and make sure your bag is properly sealed. A single grain of sand once made one of my auto focus lenses unworkable.
All images by Richard I’Anson


0 коммент.:
Отправить комментарий